Posted in Baking Day, Recipes

Chocolate Chip, Cranberry & Peanut Butter Loaf Cake

Choc Chip Loaf Cake 1January was one long month, I just couldn’t get to the end of it quickly enough.  The endless confetti of plastic windowed envelopes gliding in through my letter box on a chilly breeze; there was no mistaking these as straggling greeting cards, these were bills! Reminders of the excesses of the holiday period.  You’ll be more prepared next year though won’t you?  You’ll save a bit so you will.  Won’t we all!  Meanwhile hollow pledges aren’t going to stall the direct debits so it’s time for a stocktake of your freezer and cupboards.  What on earth is lurking in there and what indeed is it waiting for?  I know I’ve some frozen pastry sheets for just-in-case visitor moments so I’m going to pull those out and fill them for supper one of these fine evenings.
Choc Chip Loaf Cake
Choc Chip Loaf Cake 3
Choc Chip
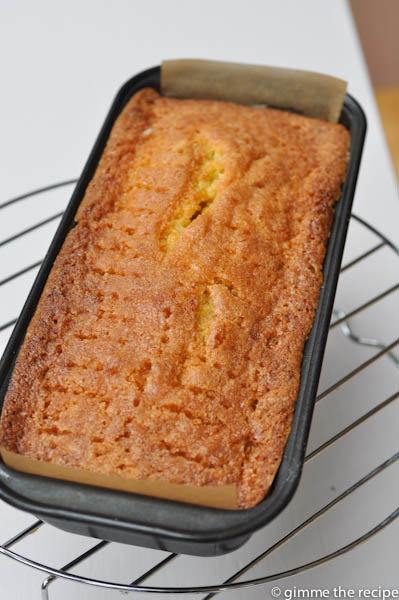
In the meanwhile a little bit of comfort.  I hadn’t baked for ages and there’s nothing like the smell particularly when it’s so rare.  The dried cranberries plump up really sweetly in a buttery cake and keeping the chocolate chunks nice and big make a slice of this a welcome wintery weather treat.
Choc Chip Loaf and Slice
Choc Chip slice
Chocolate Chip, Cranberry & Peanut Butter Loaf Cake
You will need:
150g butter
5 tbsp crunch peanut butter
175g brown sugar
250g plain flour
1 tsp baking powder
2 eggs
200g good quality chocolate (2 bars, I go for >75%)
60g dried cranberries
Method:
Grease a loaf tin with butter and line the base with a strip of baking paper.
Pre-heat the fan oven to 180C
Beat the butter and brown sugar together
Beat in one egg followed by half the flour and baking powder
Beat in the remaining egg and flour
Stir in the crunchy peanut butter, dried cranberries and the chocolate cut into large chunks
Bake for 40 to 45 minutes until nicely browned on the outside
Leave to cool for 10 minutes before removing from the tin, allow to cool further on a wire tray.
Enjoy!
‘Til next time, Sheila

Posted in Baking Day, Recipes

Banana and Peanut Butter Bread (well it’s cake really)

Banana and Peanut Butter Bread.
Banana and Peanut Butter Bread
Yes, well you are really kidding yourself here if you think you are tucking into a healthy slice of bread.  This is an indulgent cake.  That’s not to say it isn’t healthy but if you eat the whole thing it will make you fat, as will eating an entire loaf of bread.  So just have the one slice.  If you can.  Because this is one delicious cake and you’ll have to pray that the rest of your household will save you from yourself and nibble away at it too.
Banana and Peanut Butter Bread

My sister in Melbourne tells me that banana bread is everywhere and she passed on this fabulous Donna Hay recipe (come home soon Aileen).  Donna Hay’s recipes and photographs make me cry they are so beautiful.  Go on have a look and bring a hankie.

Banana and Peanut Butter Bread (from Donna Hay – slight adaptions quantities & cooking time etc.)

You will need:
125g butter
175g brown sugar
1 tsp vanilla extract
2 eggs
2 over-ripe bananas
3 tbsp crunchy peanut butter
225g plain flour
1 tsp baking powder
1 tsp baking soda
1 tsp ground cinnamon
80ml maple syrup or golden syrup
Method:
Pre-heat a fan oven 10 160oC
Line a loaf tin by greasing it with a little butter and laying a long sheet of baking paper along the bottom and up both ends (no need for paper on all sides as it will lift out if sufficiently greased)
Cream the butter and sugar together with electric mixer and add the vanilla extract.
Beat in the eggs.
Add all remaining ingredients, folding them in with a spatuala or wooden spoon rather than using the mixer as you want to gently combine everything without completely pulverising your banana and peanut butter.
Pour the mixture into a baking tin and bake for 60-70 minutes (testing with a skewer)
Cool in the tin for 20 minutes or so and then remove from tin and allow to cool on wire rack.
Enjoy!
‘Til next time, Sheila.

Posted in Baking Day

Lemon Drizzle Cake

So I’ve joined a book-club.  This means that I read one new book a month {at last I am reading again} and once a month I get to go to a friend’s house and be lavished with copious cups of tea and indulged in a selection of baked goods.  Heaven.  We all contribute and sometimes I cheat and just buy something, you know yourself there are days that are just too busy.  Last time round was a pretty busy day too but I was determined to fit in something homemade as there really is no comparison.  I needed quick, I needed simple, I needed a lemon drizzle cake.  Too flummoxed to find the scrap of paper that my own recipe is written on {I do not have the encyclopedic brain of some who can store them in their head} I turned to my failsafe source BBC Good Food and my search quickly fired back a Tana Ramsey recipe.
Lemon Drizzle Cake
Lemon Juice and sugar for drizzle
You simply bake the cake then poke holes in it and pour over a lemon and sugar syrup to soak in as it cools in the tin.  Wonderfully moist and fragrant, I can highly recommend this as a cake that can by made in a hurry with minimal fuss and attention and it cuts wonderfully.
It is pointless of me to reproduce it here as I did not change it in any way so if you click on this link it will bring you straight to Tana Ramsey’s recipe for lemon drizzle cake. {Like some of the readers who left comments on the BBC site I used the juice of the two lemons not just one and a half and I baked for 55 minutes}.
Enjoy,
‘Til next time, Sheila.

Posted in Baking Day

{Wicked} Chocolate Brownies

What does ‘Wicked’ say to you?Brownie SoloTo me it says bold, it says sinful, it says indulgent, it says chocolate.  On a food-writing course a couple of years ago, the lecturer implored us not to use the word wicked in association with chocolate.  I slid down in my chair a little when he said this as for me it was too late, by that stage my book ‘Gimme the Recipe’ was submitted and there was no turning back.  But now I’m glad that is what they are called because these really are truly wicked.  Indulgent, bold and sinful, all the bad things that makes something really good.
BrowniesPerfect for entertaining….
Brownie CloseUp…or just enjoying on their own.  I mean just look how moist they are, seeped in luscious chocolate and if that weren’t enough extra chunks bob along the top semi-melted and tipping you over to the dark side.  Indulge, enjoy!

Makes 16 to 20.

You will need:
350g dark chocolate (min 55% cocoa)
275g unsalted butter
300g caster sugar
200g plain flour
4 eggs
Icing sugar, to dust
Method:
Preheat the fan oven to 160oC/Gas mark 4 and lightly grease and line a baking tray with a little butter and baking parchment paper.
Break up 300g of the chocolate (reserve 50g for later) and cube the butter and melt them together in a bowl in the microwave (low power 1 to 2 minutes) or over a saucepan of warm water.
Gradually add the sugar and stir well.
Add the flour and stir well.
Lightly whisk the eggs in a bowl and then stir into the cooling chocolate mixture until smooth.
Pour the brownie mixture into the baking tray and break up the reserved 50g of chocolate and press it in here and there.
Bake for 25 minutes until the top is looking settled but the centre is still soft without being too gooey.
Leave to cool, dust with icing sugar and cut into 12 or 15 brownies depending on size of tins used.
Enjoy.
‘Til next time, Sheila.

Posted in Baking Day

Wholemeal Pesto Scones

Last weekend brought a wonderful excuse to visit Galway.  I travelled solo and met up with The Gravy Man at The G Hotel where we availed of their Fabulous Friday package which included a 3 course meal that was superb.  Only staying for one night, as the doors of the lift to the carpark closed on my departure I whispered ‘I’ll be back’ to the glimmering decadence of one of the three opulently and distinctly styled drawing rooms (thanks to the artful eye of milliner Philip Treacy).
I travelled alone on Saturday northwards in the direction of Oughterard and soon met the bustling village of Moycullen.  Here I ascended to the second floor of An Cearnog Nua and greeted by beautiful sunshine easily located the venue for my Gimme the Recipe demonstration – The Galway Cakery.  The demonstration and book signing had been organised by Anne Quinn of The Moycullen Village Bookshop who was there to look after book sales on the day.
The Galway Cakery
The Galway Cakery is a bright, spacious and tastefully decorated cafe and Henrike was a very welcoming host making me feel at ease and free to use what I liked from her kitchen as she got on with her own preparations for the day.  The demo went over very well and before I left I fortified myself with the homemade mushroom soup and the savoury scone that Henrike had very kindly included from my book on her menu for the day.
Specials BlackboardAs I gathered my things to leave I paused to take a few shots to share a little of the feel of the place and what’s on offer.
Cupcakes in BirdcageCocoroonsApple & Date SliceRocky RoadFlavoured Hot ChocolateCupcake on standI returned home with a boxful of goodies to try out and as an out and out chocoholic I have to say the journey to Moycullen was worth it for the brownies alone –  amazing.  Portion sizes at The Galway Cakery are very generous and both the brownie and the rocky road were sufficient for at least two people.
Selection of Cakes from The Galway Cakery
Here’s a snapshot of Henrike’s interpretation of my wholemeal pesto scone bites – they were deliciously moist and fortifying for the journey home.
Savoury Scone with cheese & pestoWholemeal Pesto Scones
Makes 10-12 regular sized
You will need:
300g wholemeal flour
150g plain flour
½ tsp salt
1 tsp bread soda
125g unsalted butter
300ml butter milk
2 tbsp basil pesto
1 egg and milk to glaze
Method:
Preheat the fan oven to 180oC/Gas mark 6.
Lightly grease two baking trays with a little butter.
Mix the wholemeal flour and plain flour with the salt and bread soda in a large bowl.
Cut the butter into cubes and crumble together with the flour with your fingertips until it resembles breadcrumbs.
Make a well in the centre, pour in the buttermilk and mix well with a fork, then stir in the pesto.
When the dough is combined, flour your hands and pour the dough out onto a floured board.  As the dough is very moist there will be no kneading –  just use plenty of flour on your hands to push it, shape it into a ball and then flatten it out either with your hands or a floured rolling pin.
Flatten or roll out the dough to a thickness of approximately 2cm.
Use a medium sized round pastry cutter to cut out approximately 10-12 scones.
Place the scones on the greased baking trays and brush the tops and side with some beaten egg and milk mixed together.
Bake for 15-20 minutes until nicely risen and golden brown.
Cool on a wire rack.
Enjoy.
Til next time, Sheila.